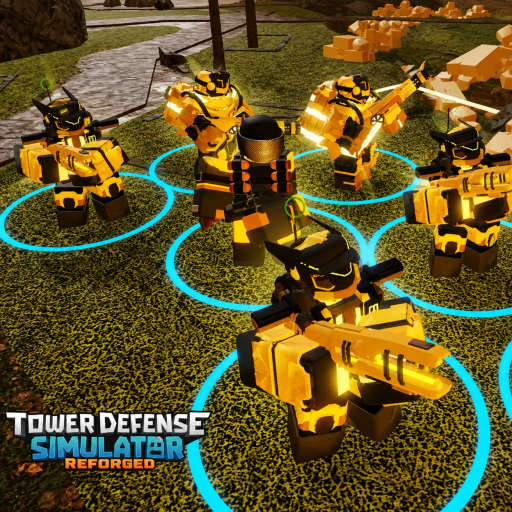
TDS Reforged Advanced Loadout Strategy
Build loadouts that adapt to any mode—beyond the basics of picking S-tier towers.

Most TDS Reforged players understand that S-tier towers are powerful, but few understand how to build a loadout that actually uses tower strengths effectively. This guide covers the architectural decisions behind high-performing loadouts: economy curves, role distribution, wave-specific adaptations, and late-game optimization.
Loadout Architecture Fundamentals
A loadout is not just a collection of powerful towers—it is a system designed to handle specific challenges across different wave phases. The most common mistake is building toward a “perfect late-game board” without accounting for the early and mid-game transitions that get you there.
Think of your loadout in three phases:
- Early game (waves 1-15): Survive without bleeding, establish economy
- Mid-game (waves 16-30): Transition from early defense to carry dominance
- Late game (waves 31+): Maximize carry effectiveness with support utilities
Each phase has different requirements, and your tower choices should reflect this progression.
Economy Curve Analysis
Your economy curve determines when you can afford meaningful upgrades. A well-designed economy curve gets you to your first carry by wave 10-15 while maintaining enough early defense to avoid leaks.
The basic principle: never over-invest in early defense that becomes obsolete. A tower that clears wave 1-10 perfectly but contributes nothing after wave 15 is a liability, not an asset.
Economy Timing Examples
Standard loadout curve:
- Wave 1-5: Place cheap defenders (basic towers with low placement cost)
- Wave 6-10: Introduce economy tower, begin saving for first carry
- Wave 11-15: Place first carry if affordable, otherwise continue economy
- Wave 16+: Upgrade carries, add control utilities
Aggressive curve:
- Wave 1-8: Maximum early defense
- Wave 9-12: Sell early defenders, place carry early
- Wave 13+: Accelerated carry upgrades
Defensive curve:
- Wave 1-12: Heavy early defense investment
- Wave 13-20: Slow transition to carries
- Wave 21+: Controlled carry placement with full economy support
Role Distribution
A balanced loadout needs coverage in five core roles:
| Role | Purpose | Examples |
|---|---|---|
| Early defense | Handle waves 1-15 without leaks | Basic towers, early upgrades |
| Economy | Fund carry transition | Income towers, sell windows |
| Primary carry | Main damage output | Enforcer, Golden Minigunner, Executioner |
| Control | Slow, stun, reposition enemies | Slowing Towers, specialized control |
| Flex | Mode-specific adaptation | Detection, armor-break, secondary carry |
Most players correctly identify primary carry and early defense. The common gap is insufficient control coverage, which causes leaks against fast enemies or bosses even when carry damage is adequate.
Wave-Specific Adaptations
No single loadout is optimal for all wave types. Advanced players maintain a “flexible framework” rather than a fixed build:
Hidden Enemy Waves
When Hidden enemies appear, your flex slot should provide detection. If your current loadout lacks detection, you need to either:
- Sell a lower-value tower before the hidden wave
- Reposition existing towers to maximize coverage
- Accept a controlled leak and recover afterward
Speed Modifier Waves
Fast enemies require hard slows to keep them in carry range. If Slowing Towers are not part of your core loadout, consider adding control utilities or repositioning to create natural chokepoints.
Boss Waves
Boss waves around wave 25-40 require single-target burst. If your loadout is optimized for group control, you need to swap the flex slot to your highest single-target damage option.
Late-Game Optimization
Late-game loadout decisions separate good players from great ones:
Upgrade Prioritization
When you have limited funds for upgrades, prioritize in this order:
- Primary carry max upgrades — your main damage source should always be as strong as possible
- Control utility upgrades — keeping enemies in range extends carry effectiveness
- Economy optimization — if you cannot afford upgrades, improve income
- Flex slot enhancement — only if the current flex is actively causing leaks
Selling and Repositioning
Late-game selling is risky but sometimes necessary. Only sell when:
- The tower being sold is actively contributing to a leak
- You have positive cash flow to fund replacement
- The replacement addresses the specific failure point
Panic selling during an active crisis rarely improves your position.
Mode-Specific Loadouts
Hardcore Loadout Framework
Hardcore requires sustained damage output because there is no death reset. Your loadout should emphasize:
- Reliable early defense that does not require constant attention
- Economy that funds carry placement by wave 12-15
- Primary carry with high sustained DPS (Golden Minigunner preferred)
- Control coverage for speed modifiers
- Detection for hidden waves
Death Invasion Loadout Framework
Death Invasion spawns large numbers of enemies, requiring:
- Strong early defense to handle volume
- Sustained AoE for group control
- Economy that handles extended matches
- Boss-killing capability for wave 30+
Polluted Core Loadout Framework
Polluted Core amplifies damage-over-time effects:
- Golden Toxic Gunner as primary or secondary carry
- Towers that maintain enemy contact for poison stacking
- Control to keep enemies in poison range
- Standard economy and defense otherwise
Loadout Verification
After building any loadout, verify it covers these minimum requirements:
- Early defense without leaks for waves 1-15
- Economy sufficient to place first carry by wave 15
- Primary carry identified and upgradeable
- Control coverage for fast enemies
- Flex slot that addresses likely mode-specific challenges
- Detection capability if hidden enemies are common in your mode
Use the Loadout Planner to save and test different configurations. The Wave Checklist can help you identify which requirements your current loadout fails to meet.
Common Loadout Mistakes
Mistake 1: Building all S-tier towers without role coverage Even S-tier towers fail if they overlap roles while leaving gaps in coverage.
Mistake 2: Over-investing in early defense Towers that dominate waves 1-10 but contribute nothing later waste resources.
Mistake 3: Ignoring control No matter how strong your carry is, fast enemies will bypass it without control.
Mistake 4: Inflexible loadouts The best loadouts adapt to wave conditions rather than executing a fixed script.
Mistake 5: Selling during crisis Panic selling during active leaks typically makes the situation worse.
Related Pages
- Loadout Planner — test loadout configurations
- Wave Checklist — verify loadout coverage
- Economy and Cash — detailed economy management
- Tower Roles — understand tower role assignments
- Overall Tier List — tower role rankings
- Hardcore Tier List — mode-specific viability
Frequently Asked Questions
Quick answers to the most common questions.
What is the most common loadout mistake?
Building all S-tier towers without ensuring role coverage. A balanced loadout with A-tier towers that covers all roles consistently outperforms an imbalanced S-tier loadout with gaps.
When should I sell towers in late game?
Only sell when the tower is actively causing leaks, you have positive cash flow, and the replacement addresses the specific failure. Panic selling during crisis rarely helps.
How do I handle hidden enemy waves?
Ensure your flex slot provides detection capability, or be prepared to sell and reposition before hidden waves appear. Detection coverage is non-negotiable in modes with frequent hiddens.
What is the ideal economy curve?
Get your first carry placed by wave 10-15 while maintaining early defense that does not leak. The exact timing depends on your loadout and game mode.
How many towers should my loadout have?
TDS Reforged allows 5 primary slots plus Vanguard in the 6th slot. Fill all slots strategically rather than leaving slots empty for 'flexibility'—unused slots are wasted resources.